
Just made a weekly backup script of Image-Charts @Cloudflare DNS settings in BIND format.
It's based on flares and Gitlab CI pipeline schedules & artifacts
Find the 3-steps tutorial and .gitlab-ci.yml file here
 10/31/2018
Just made a weekly backup script of Image-Charts @Cloudflare DNS settings in BIND format.
It's based on flares and Gitlab CI pipeline schedules & artifacts
Find the 3-steps tutorial and .gitlab-ci.yml file here
4/15/2018
Since ~2000 I always setup a "/labs" folder on new computers. I use it to quickly start new projects and experiments.
Even if I have continuous backup in place through Backblaze, I wanted, for non-public & non-open-source projects to be able to quickly sync/backup them to Gitlab... and that's what this script do.
2/26/2018
This article is a follow up of Continuous Deployment with Gitlab, Gitlab-CI and CleverCloud, you might want to read it first!
Nearly 1 year past, clever-tools is now a single binary (along with a native node extension) packaged by pkg, we can easily improve our CI/CD workflow now! Instead of :
deploy:clevercloud:
  image: node:6-wheezy
  stage: deploy
  only:
    - /master/
  script:
    - git remote add clever https://$CLEVER_TOKEN:$CLEVER_SECRET@push-par-clevercloud-customers.services.clever-cloud.com/app_YOUR_APPLICATION_ID.git
    - git push --verbose --force clever master 2>&1 | grep -e 'remote:' -e '->'
my .gitlab-ci.yml now contains
deploy:clevercloud:
  image: ubuntu
  stage: deploy
  only:
    - /master/
  script:
    - apt-get update && apt-get install -y curl
    - curl https://clever-tools.cellar.services.clever-cloud.com/releases/latest/clever-tools-latest_linux.tar.gz > clever-tools-latest_linux.tar.gz
    - tar -xvf clever-tools-latest_linux.tar.gz
    - ./clever login --token $CLEVER_TOKEN --secret $CLEVER_SECRET
    - rm -f .clever.json
    - ./clever link -a deploy $APP_ID
    - ./clever deploy -a deploy
Now my deploy job displays CleverCloud deployment logs, awesome right?
1/21/2018
Currently Gitlab does not support artifact removal if you forgot to set an expires_in parameter.
I was not a huge fan of the current solutions so I made my own. Instead of looping through every job ids that might be yours we extract the job ids through the browser JavaScript console and use them inside our script below :
#!/bin/bash

# project_id, find it here: https://gitlab.com/[organization name]/[repository name]/edit inside the "General project settings" tab
project_id="3034900"

# token, find it here: https://gitlab.com/profile/personal_access_tokens
token="Lifg_azxDyRp8eyNFRfg"
server="gitlab.com"

# go to https://gitlab.com/[organization name]/[repository name]/-/jobs
# then open JavaScript console
# copy/paste => copy(_.uniq($('.ci-status').map((x, e) => /([0-9]+)/.exec(e.href)).toArray()).join(' '))
# press enter, and then copy the result here :
# repeat for every page you want
job_ids=(48875658 48874137 48873496 48872419)

for job_id in ${job_ids[@]};
do
 URL="https://$server/api/v4/projects/$project_id/jobs/$job_id/erase"
 echo "$URL"
 curl --request POST --header "PRIVATE-TOKEN:${token}" "$URL"
 echo "\n"
done
Who does not fight everyday to follow the least surprise/astonishment principle? I know I do and my last issue was related with Gitlab-CI.
I had to wait after each git push to discover if my .gitlab-ci.yml file was valid or not.
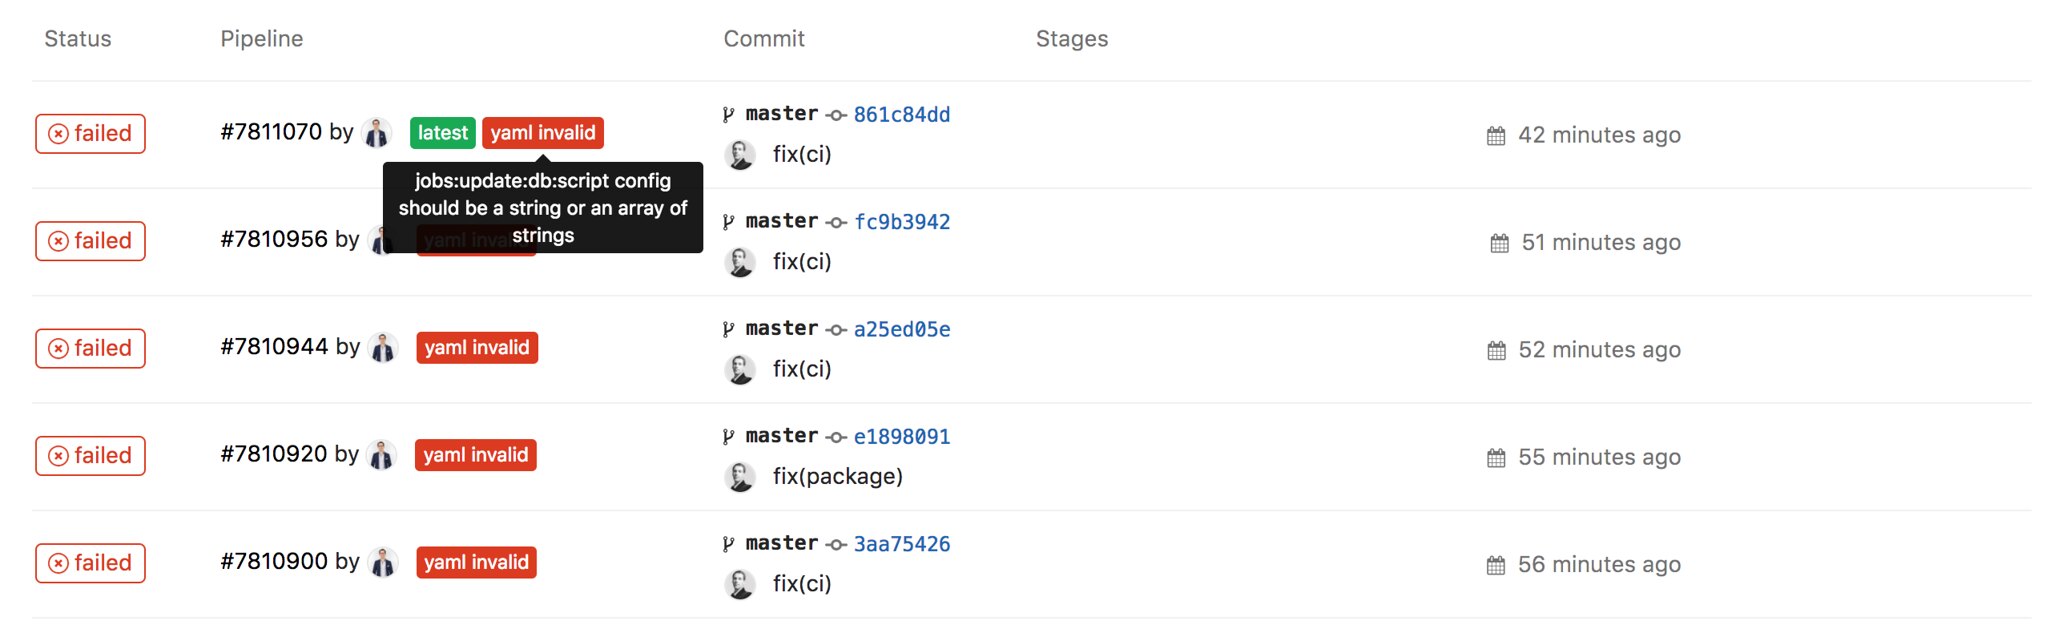
As usual, automation is the answer. Wouldn't it be awesome if we could run this:
gitlab-ci-validate-watch
And then edit our .gitlab-ci.yml until it's valid? That would be really awesome right?
Sadly at the time of writing Gitlab-CI documentation and API requires us to send our YAML file in stringified JSON format inside a content object to /api/v4/ci/lint api endpoint. Yep, that's a lot of hard work for such a simple task.
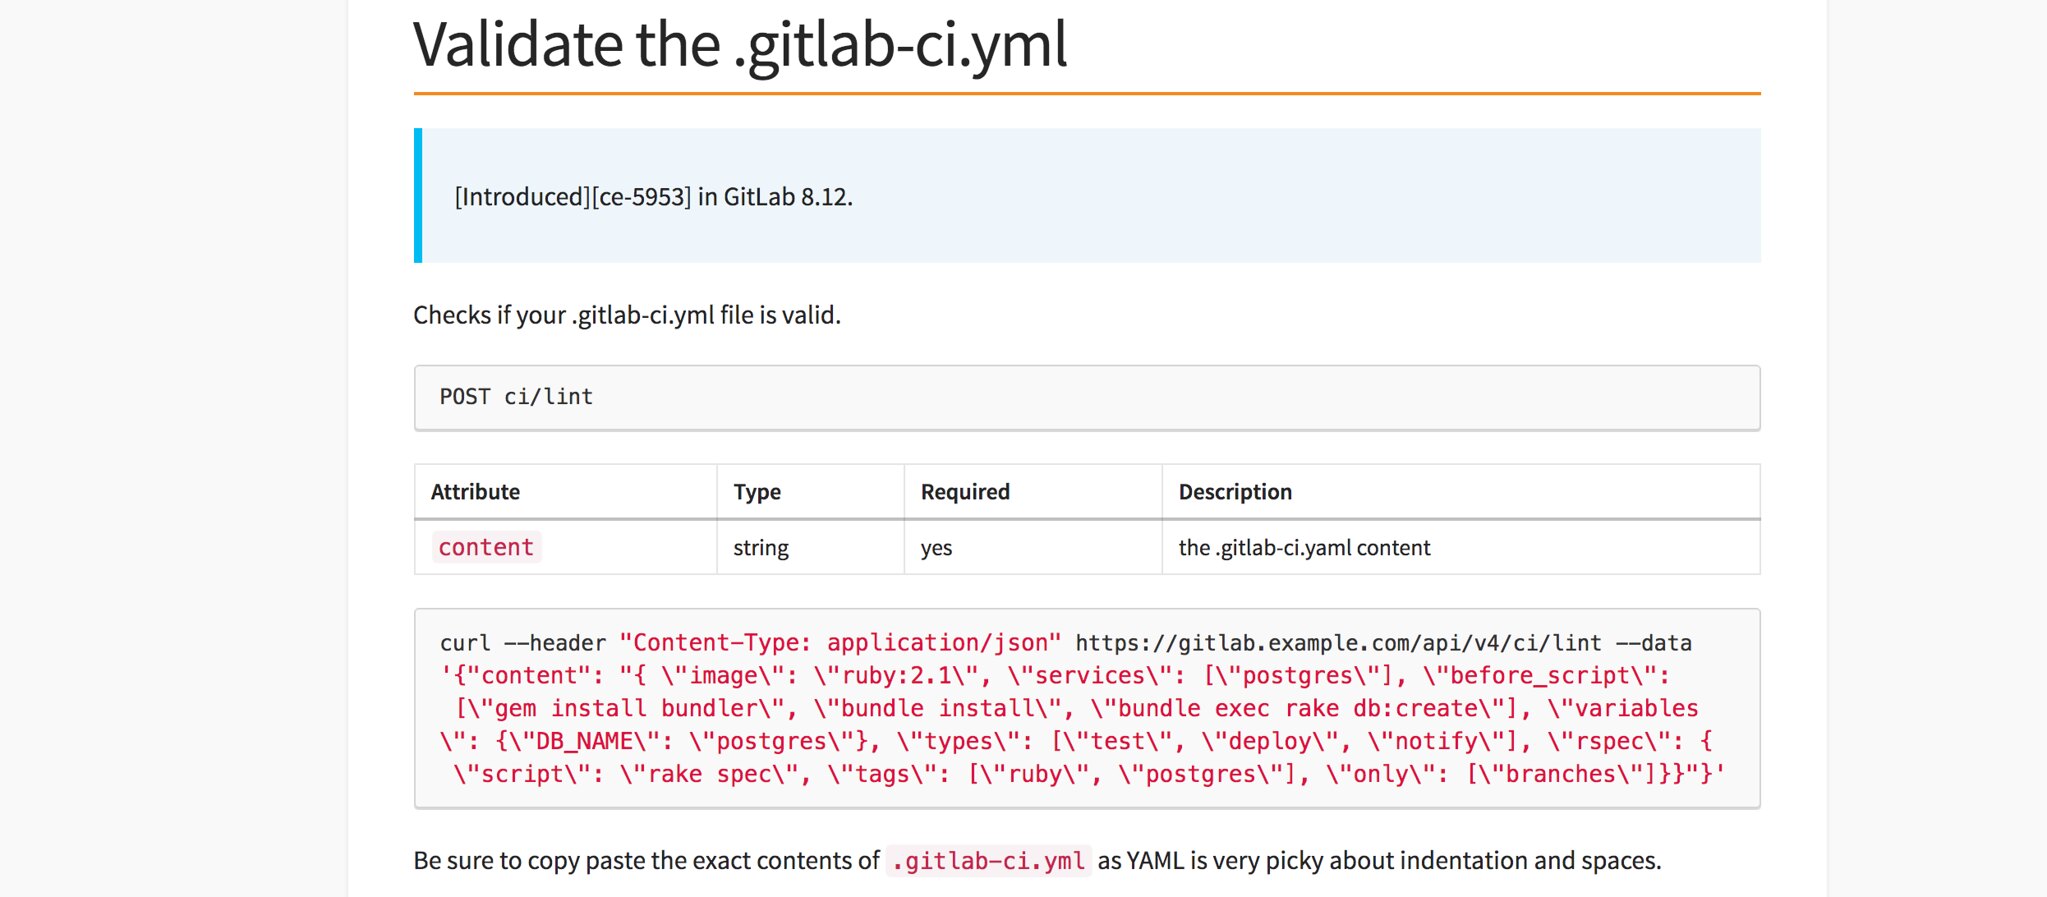
Fortunately we can leverage jq.node (it's like jq but WAY MORE powerful) for that along with watchexec!
If you do not have jq.node and watchexec installed it's never too late:
npm i jq.node -g
brew install watchexec
With these two I was able to write the following helpers (don't forget to add them inside your ~/.zshrc or equivalent):
function gitlab-ci-validate(){
  DATA=$(jq.node -r js-yaml -x 'jsYaml.safeLoad | thru(x => (JSON.stringify({content: JSON.stringify(x)})))' < .gitlab-ci.yml)
  curl -s --header "Content-Type: application/json" https://gitlab.com/api/v4/ci/lint --data $DATA | jq.node
}

function gitlab-ci-validate-watch(){
  watchexec --watch $(pwd)/.gitlab-ci.yml 'zsh -c "source ~/.zshrc && gitlab-ci-validate"'
}
gitlab-ci-validate validates .gitlab-ci.yml file from the current working directory using gitlab.com (it will also work with self-hosted gitlab instances) and gitlab-ci-validate-watch runs gitlab-ci-validate every time I save .gitlab-ci.yaml.
gitlab-ci-validate
{
  "status": "invalid",
  "errors": [
    "jobs:update:db:script config should be a string or an array of strings"
  ]
}
For extra sweetness, we might want to run gitlab-ci-validate before each git push using git pre-push hook.
4/03/2017
⚡️ If you wish to use Clever-tools binary check out Continuous Deployment on CleverCloud with Clever-tools, Gitlab-CI ⚡️
Recent events aside, Gitlab and Gitlab-CI is a great integrated forge for software development. I recently decided to migrate Image-Charts on it as well as the soon-to-be-announced-new-SaaS from the old Bitbucket, Jenkins workflow used at Redsmin and Bringr.
As a side note, JenkinsFile never grew up on me, I never liked it, it's too verbose and I definitely prefer the configuration approach (limited feature-set) over the code (unlimited but can quickly get messy) approach.
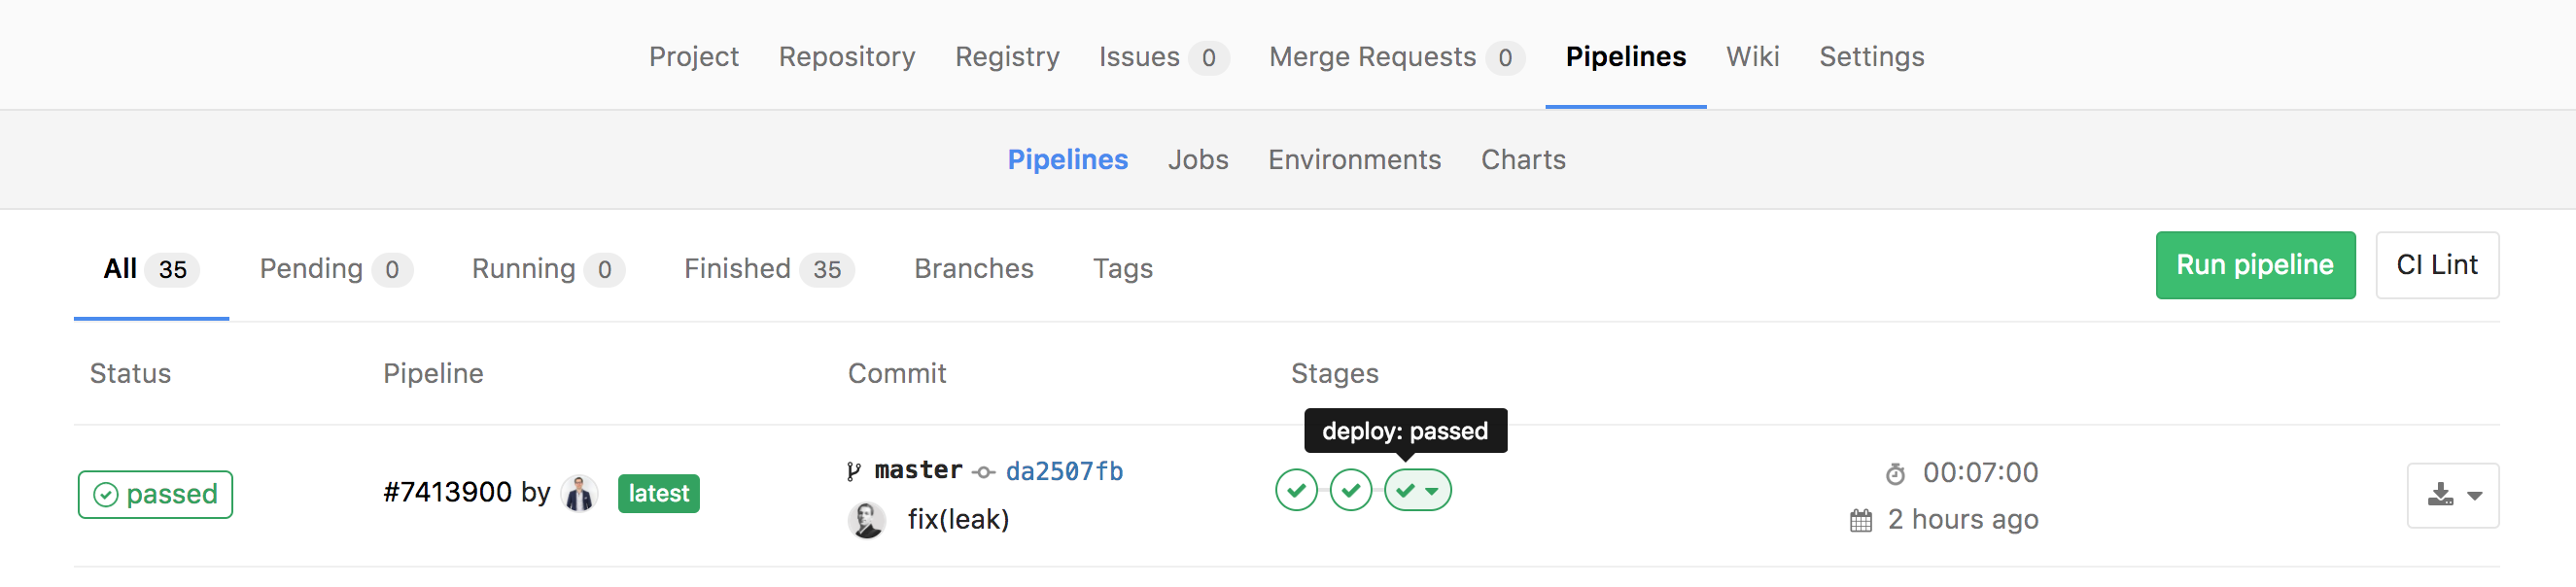
I first tried to setup a private deploy SSH key as an environment variable and then inject it using GIT_SSH_COMMAND and then hack the known_hosts file to fix the sadly well-known Host key verification failed issue aaaand don't forget to chmod 400! Phew, that's a lot of work for something that should be easy to do. Thankfully there is a simpler way!
You will first need to install clever-tools locally (if you did not already). We could do the following steps without it but doing the oAuth dance through the API is not as easy as using Clever CLI.
npm i clever-tools -g
Then login:
clever login
And now the good part:
cat ~/.cleverrc
{"token":"7ea753c8cb23000000000000000","secret":"02000000700000000047000200"} // copy token and secret value
Open the Gitlab-CI project CI/CD settings, add CLEVER_TOKEN and CLEVER_SECRET environment variables with the values you just copied.
Finally edit your project .gitlab-ci.yml like so:
deploy:clevercloud:
  image: node:6-wheezy
  stage: deploy
  only:
    - /master/
  script:
    - git remote add clever https://$CLEVER_TOKEN:$CLEVER_SECRET@push-par-clevercloud-customers.services.clever-cloud.com/app_YOUR_APPLICATION_ID.git
    - git push --verbose --force clever master 2>&1 | grep -e 'remote:' -e '->'
Let's take it step by step:
deploy:clevercloud: the job name, could be deploy or whatever you wantimage: node:6-wheezy: I used this docker image on the previous steps because the app is in NodeJS you can use any docker image you want as long as it has git installedstage: deploy: gitlab-ci pipeline stage.only: - /master/: restrict this job to the master branch.git remote add clever ...: we first need to add CleverCloud remote git repository to the build local git repository.... https://$CLEVER_TOKEN:$CLEVER_SECRET@push-par-clevercloud-customers.services.clever-cloud.com/...: this is where the magic happens, instead of using git+ssh we are using https transport, the authentication is through basic auth token:secret and thus we don't need to setup a private ssh key.... clevercloud-customers.services.clever-cloud.com/app_YOUR_APPLICATION_ID.git ...: don't forget to set your APPLICATION_ID.... git push --force clever master ... I always use --force in CD pipelines, I don't want anyone else to bypass the CD pipeline. It's often a source of longer outage when tests are bypassed to fix directly the production environment.... 2>&1 | grep -e 'remote:' -e '->' ... this part is very important, without it token:secret will leak into job logs and even emails in case of job failure.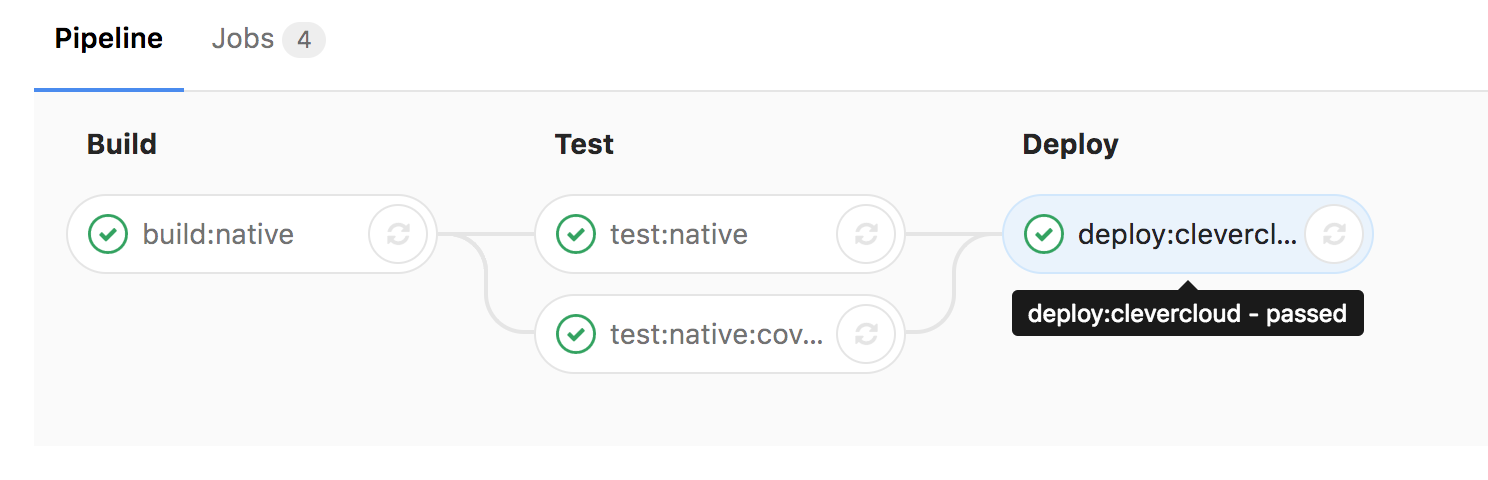
That's it! It only took 2 lines in a Gitlab-CI job to automatically deploy your project on CleverCloud.
Deploying to CleverCloud is only one side of the story, I hope to share later the Gitlab-CI pipeline I use to deploy the soon-to-be-announced-new-SaaS with Kubernetes on Google Container Engine.